There’s something undeniably comforting about indulging in a sweet treat after a long day, and with my Oreo Mug Cake, that blissful moment is just a minute away. Picture yourself nestled on your couch, ready to unwind, as the tantalizing scent of chocolate wafts through the air. With just a few simple ingredients and a quick spin in the microwave, this delightful dessert brings back the essence of childhood, where Oreos were the ultimate snack.
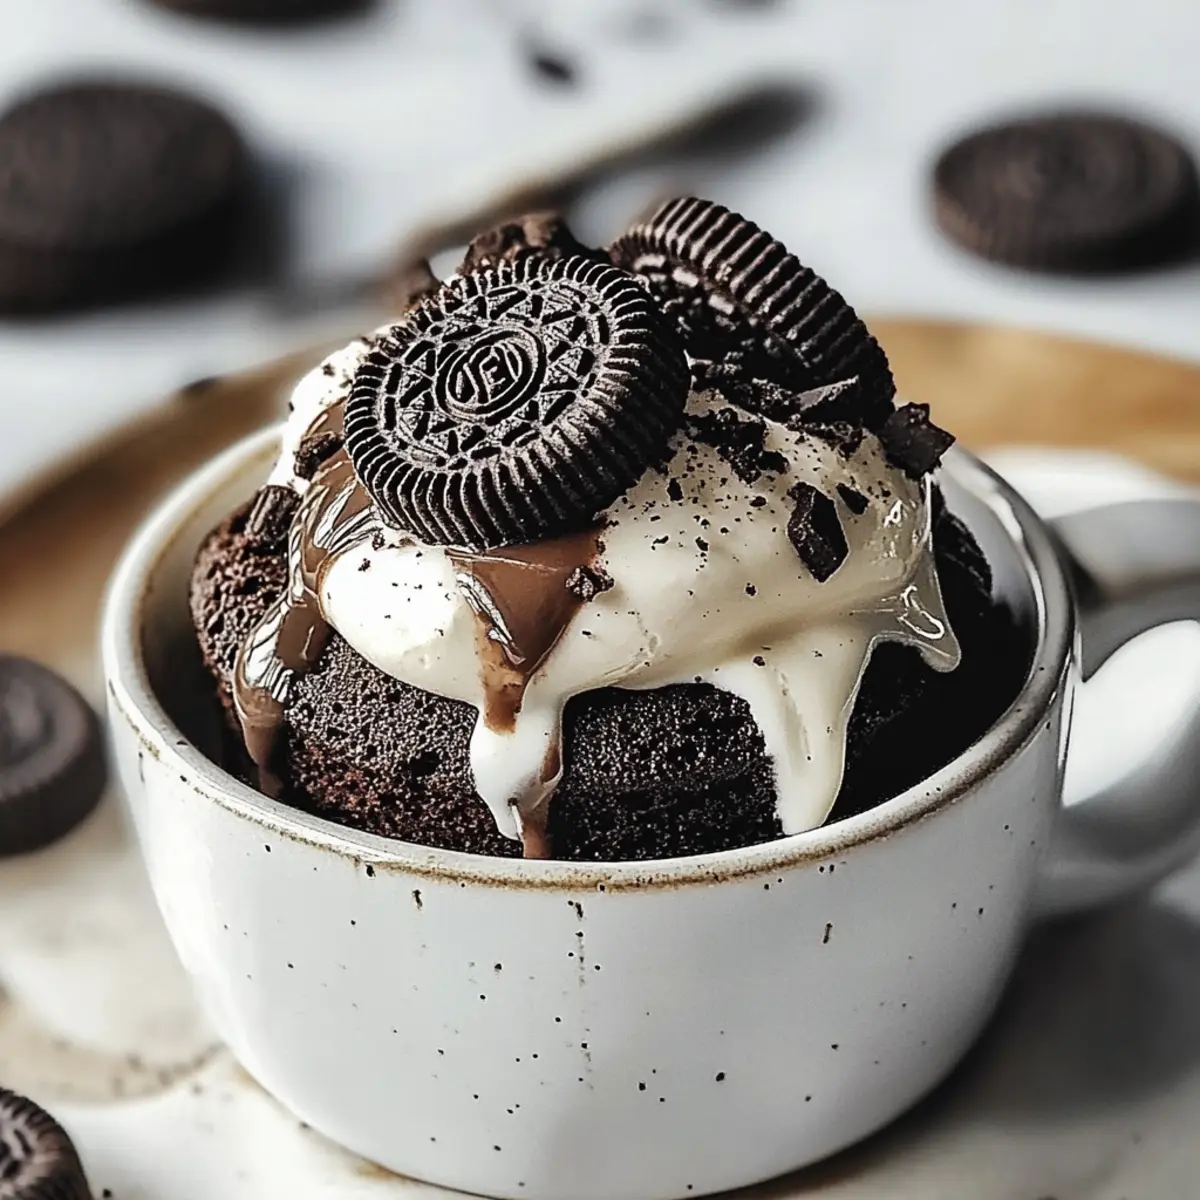
What I love most about this recipe is its incredible ease: no oven necessary, no lengthy preparation, just pure deliciousness in a mug. As I savored my first bite, the rich chocolate mingled with the crunchy bits of Oreo, and I couldn’t believe a decadent dessert could be this simple! Perfect for a solo evening or a quick fix for unexpected guests, this Oreo Mug Cake is your ticket to delicious satisfaction in mere minutes—a little slice of joy when you need it most. Let’s dive into the steps for creating this instant classic!
Why You'll Love This Oreo Mug Cake
- This Oreo Mug Cake is the ultimate easy dessert that requires no special skills or equipment.
- The rich combination of chocolate and Oreo creates an indulgent flavor that will satisfy your sweet tooth instantly.
- It’s incredibly versatile; you can enjoy it plain or elevate it with toppings like whipped cream or ice cream.
- Ready in just three minutes, this mug cake saves you time while still delivering a crowd-pleasing treat.
Oreo Mug Cake Ingredients
• Get ready for a chocolate delight!
For the Batter
- All-purpose flour – Gives the cake structure and a delightful texture.
- Cocoa powder – Adds rich chocolate flavor; use Dutch-process for a deeper taste.
- Granulated sugar – Sweetens the batter perfectly; consider using coconut sugar for a twist.
- Baking powder – Helps the cake rise to the occasion, creating a fluffy texture.
- Milk – Whole or almond milk will work here, providing moisture to the mixture.
- Vegetable oil (or melted butter) – Keeps the cake moist; melted butter adds a richer flavor.
- Vanilla extract – Enhances the overall sweetness and aroma of the cake.
- Crushed Oreo cookies – The star ingredient, adding bits of chocolatey goodness throughout the cake.
Now that you have your ingredients ready, you’re just moments away from savoring a homemade Oreo Mug Cake that’s sure to delight!
How to Make Oreo Mug Cake
-
Mix Dry Ingredients: In a microwave-safe mug (12 oz or larger), combine the flour, cocoa powder, granulated sugar, and baking powder. Stir well until everything is blended nicely.
-
Add Wet Ingredients: Pour in the milk, vegetable oil, and vanilla extract to the dry mixture. Stir thoroughly until the batter is smooth and creamy, making sure no dry spots remain.
-
Incorporate Oreos: Gently fold in the crushed Oreos into the batter. This will ensure the iconic cookie delights are evenly distributed throughout your cake.
-
Microwave It: Place your mug in the microwave and cook on high for about 1 minute. Keep an eye on it to prevent any overflow—everyone loves a well-risen cake!
-
Cool Before Enjoying: Allow your Oreo Mug Cake to cool for about 2 minutes. You can enjoy it directly from the mug or top it off with whipped cream or ice cream for an extra treat.
Optional: Drizzle with chocolate sauce for an added layer of indulgence!
Exact quantities are listed in the recipe card below.
What to Serve with Oreo Mug Cake?
Indulging in a warm, chocolatey mug cake can be even more delightful with the right pairings.
-
Whipped Cream: Topping your cake with fluffy whipped cream adds a light, airy contrast to the rich chocolate flavor. It makes every bite feel like a party!
-
Vanilla Ice Cream: A scoop of creamy vanilla ice cream on top melts into the warm cake, creating a delightful chocolate-and-vanilla harmony. This classic combo will whisk you back to childhood ice cream socials!
-
Fresh Berries: The burst of tartness from strawberries or raspberries cuts through the sweetness of the cake, providing a refreshing complement that brightens your dessert experience.
-
Chocolate Sauce: Drizzling warm chocolate sauce over the mug cake amplifies the chocolatey goodness. It’s an invitation to indulge even further—perfect for true chocolate lovers!
-
Coffee or Espresso: Sipping on a rich cup of coffee balances the sweetness of your Oreo Mug Cake, creating a comforting moment to savor at home. It’s the perfect pairing for an afternoon treat!
-
Nutella Spread: If you crave extra indulgence, a spread of creamy Nutella elevates your cake with added richness, winning over any dessert enthusiast in the room.
-
Milk (or Plant-Based Milk): A tall glass of cold milk is a nostalgic companion that enhances the flavors of the cookie cake—an unbeatable duo!
-
Chopped Nuts: Adding a sprinkle of crunchy nuts offers a delightful texture contrast, enhancing the overall experience of your decadent treat.
Mix and match these pairings to elevate your Oreo Mug Cake into a dessert celebration you and your loved ones will cherish!
Make Ahead Options
These Oreo Mug Cakes are perfect for busy home cooks looking to save time while satisfying their sweet tooth! You can prep the dry ingredients—flour, cocoa powder, sugar, and baking powder—up to 3 days in advance by mixing them in a small container and keeping them in the pantry. Just remember to store the crushed Oreos separately to maintain their crunch. When you’re ready to enjoy your mug cake, simply add the wet ingredients (milk, vegetable oil, and vanilla extract) to the prepped dry mixture, fold in the Oreos, and microwave for about 1 minute. This way, you’ll have a delicious treat ready to go in just minutes, making your dessert game effortlessly simple!
Oreo Mug Cake Variations
Feel free to get creative and make this Oreo Mug Cake your own—each variation brings a unique twist to this classic treat!
-
Gluten-Free: Swap the all-purpose flour for gluten-free flour blend, and enjoy this cake without worry!
-
Nutty Delight: Add 1 tablespoon of almond or hazelnut spread smoothly into the batter, giving a rich, nutty flavor.
-
Minty Fresh: Incorporate a few drops of peppermint extract instead of vanilla for an invigorating minty twist that elevates each bite.
-
Chocolate Overload: Toss in a handful of chocolate chips alongside the Oreos for an extra chocolate punch that will make your taste buds dance!
-
Fruity Touch: Mix in fresh raspberries or sliced bananas to the batter; their natural sweetness pairs perfectly with the chocolatey goodness.
-
Spicy Surprise: Sprinkle a pinch of cayenne pepper into the batter for a surprising kick of heat—perfect for adventurous palates that like to mix sweet with spicy!
-
Vegan Version: Substitute the milk with plant-based alternatives such as coconut or oat milk and use unsweetened applesauce in place of the oil for a delightful vegan treat.
-
Caramel Drizzle: Before microwaving, add a tablespoon of caramel sauce on top of the batter; it will melt and swirl through the cake, creating a luscious layer of sweetness.
How to Store and Freeze Oreo Mug Cake
Room Temperature: Consume your Oreo Mug Cake immediately after preparation for the best taste; if needed, it can sit out for up to 2 hours.
Fridge: Store leftovers in an airtight container in the fridge for up to 3 days. The cake may dry out, so consider reheating it slightly before enjoying.
Freezer: For longer storage, freeze the cooled cake in a freezer-safe container for up to 1 month. Thaw in the fridge overnight before microwaving for a warm treat.
Reheating: To reheat, microwave the cake for about 10-15 seconds, checking to avoid overheating. Enjoy your delicious Oreo Mug Cake once again!
Chef's Helpful Tips
- When making an Oreo Mug Cake, ensure you measure your ingredients accurately to achieve the right texture.
- A common mistake is overmixing the batter; stir just until combined to maintain a light and fluffy cake.
- For an extra chocolatey flavor, consider using Dutch-process cocoa powder instead of regular cocoa powder.
- Microwave times can vary, so start with one minute and check for doneness by gently pressing the top of the cake; it should spring back slightly.
- Allow the cake to cool for a couple of minutes before digging in to avoid burns and enhance the flavor.
- Adding a scoop of ice cream on top is a delicious way to elevate your dessert experience.
Oreo Mug Cake Recipe FAQs
What type of Oreos work best for this recipe?
Absolutely! While classic Oreos are fantastic for this mug cake, you can also experiment with different flavors like Double Stuf, Peanut Butter, or even the seasonal limited-edition cookies. Each variety will lend its unique twist to the cake, creating a delightful surprise!
How should I store leftover Oreo Mug Cake?
If you have leftovers, I recommend placing them in an airtight container and storing them in the fridge for up to 3 days. This helps keep the cake fresh! Just be aware that it can dry out a bit, so a quick reheat in the microwave—about 10-15 seconds—will do wonders before you enjoy it again.
Can I freeze the Oreo Mug Cake?
Yes, you can freeze it! Allow your Oreo Mug Cake to cool completely, then wrap it tightly in plastic wrap or place it in a freezer-safe container. It can last in the freezer for up to 1 month. When you’re ready to indulge, just thaw it in the fridge overnight and microwave it for 10-15 seconds to warm it through.
What should I do if my mug cake spills over while microwaving?
Very! To prevent overflow, always use a mug that’s at least 12 oz or larger. If it does overflow a bit while microwaving, don’t panic! Simply pause the microwave, clean up quickly, and then continue cooking. You want the cake to rise, so keep an eye on it the whole time. If it spills, it will still be delicious—even if it’s a little messy.
Are there any dietary considerations for this recipe?
Indeed! If you or someone you are serving has a gluten intolerance, you could try a gluten-free all-purpose flour instead of regular all-purpose flour. Also, for those with lactose intolerance, using almond milk works beautifully in this recipe! Always consider the ingredients in the Oreos depending on dietary needs and allergies, especially if serving to pets; chocolate is toxic to dogs, so keep those treats away from them.
Can I make this recipe without a microwave?
Absolutely! If you prefer not to use the microwave, you can bake this Oreo Mug Cake in the oven. To do so, preheat your oven to 350°F (175°C) and pour the batter into a small greased oven-safe ramekin. Bake for about 15-20 minutes, or until a toothpick inserted in the center comes out clean. Just keep an eye on it as baking times can vary depending on your oven!
Oreo Mug Cake
Ingredients
Equipment
Method
- In a microwave-safe mug (12 oz or larger), combine the flour, cocoa powder, granulated sugar, and baking powder. Stir well until everything is blended nicely.
- Pour in the milk, vegetable oil, and vanilla extract to the dry mixture. Stir thoroughly until the batter is smooth and creamy, making sure no dry spots remain.
- Gently fold in the crushed Oreos into the batter. This will ensure the iconic cookie delights are evenly distributed throughout your cake.
- Place your mug in the microwave and cook on high for about 1 minute. Keep an eye on it to prevent any overflow.
- Allow your Oreo Mug Cake to cool for about 2 minutes before enjoying it directly from the mug or topped with whipped cream or ice cream.